魅客学院学生创客作品秀
张一帆 智能窗帘
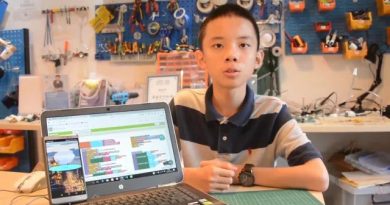
我叫张一帆,是一名高中生,同时也是魅客学院Arduino代码编程班学生,老师:余晖博士(正在申请美国学校)。
简介:厌倦了每天早上晚上开关窗帘,我决定自行将普通的窗帘改造为可以应对外部光强自行开关的自动窗帘。在包括丝杆,传送带,钓线的最初的多种设计方案中,我最终选择了传送带方案以降低开支并增强系统稳定性与安全性。
制作步骤
1、购买材料。
我担心普通的电机可能会在多次运作后产生距离误差,采用了步进电机。材料清单包括步进电机,传送带,齿轮,光强传感器,以及Arduino版。


2、编程。
程序由两部分组成:步进电机驱动与亮度传感器。亮度传感器每分钟会想控制板传送10次光强测量值,并存入数组。对数组内所有数求和后得到的值即为去除干扰之后的光强值,此值将被输入到Arduino板中。采用此方式意在避免窗帘对短时间的光强变化,如夜晚时手电筒的照射,做出反应。在每次测量后进行延迟,降低控制板工作压力。开值和关值之间必须有间隔,否则窗帘将有可能在零界点持续开关。


3、测试。
使用A4988步进电机驱动板,根据程序连线。步进电机驱动程序与连接方式可百度。在测试过程中,需要检测系统可靠性,无接触不良或过度发热,并根据个人喜好确定光强零界点。测试结束后进入电机支撑装置设计制作阶段。


4、3D打印支撑盒。
使用3D one(教育版)完成建模,使用Repetier-Host切片并转换为gcod文件。模型的大小由使用的电机尺寸以及天花板具体情况决定。模型厚度5mm,填充密度20%。


5、总装。
使用电钻打孔后打入膨胀螺钉,安装系统。打孔时推荐在地上铺报纸以避免打孔产生的粉末造成室内污染。推荐在膨胀螺钉与3D打印件接触位子加入垫片以提高结构强度,避免塑料老化变形后带来的问题。传送带与窗帘的连接点建议加入一定的角度以降低电机工作压力。


6、最终调试。
电源可根据室内情况安置,Arduino版使用透明胶粘在窗户边框上,系统完成。


英文介绍 by 张一帆
Tired of opening and closing the curtain every morning and evening, I tried to design a device that can open and close the curtain in my room automatically according to the illumination outside. My initial design is to use a motor to move a a rubber conveyor that is connected with the curtain. Here’s a scratch of my design. In fact, I have several different designs, including using a screw rod, using two motors with a line, and using conveyor. Finally, I decided the use adopt the conveyor design because its both cheap and easy.
1.Purchase needed items on the internet
I afraid the common motors may not pull the curtain to the right place every time, so I decided to use steppers. I bought steppers, conveyors, gears, and light-sensitive resistors from the internet. With the help of the internet, I also learned the correct way to use steppers. The limited voltage one the stepper is definitely wrong–3.3V DC is too low. I used a 12 volt power supply.
My program consists of two parts: stepper drive part and light measurement part. Every minute, the light measurement part will measure the ligth intensity 10 times and save all these data into a array. Than all elements of the array is added together to get the final value that determines the opening or closing of the curtain. I decided to measure the light intensity 10 time mainly to avoid sudden and short variations of light intensity. For example, if the light-sensitive resistor is illuminated by someone’s electric torch at the mid night for a second, my Smart Curtain won’t open because a single high light intensity value will not increase the sum of all ten values too much. There is also a gap between opening and closing value in order to prevent the constant opening and closing when the light intensity is close to the threshold value. If the opening and closing values are the same number, for instance, 100, the usual light intensity fluctuation near 100 will cause the curtain to open or close many times. I also set long delays because it is not important to measure the light intensity so often. The txt of my Arduino program is provided above.
3.Connect the wires and test
Connect the wires according to my program, and test the motor drive, stepper, light-sensitive resistor, and program before implementing them on the wall. The first picture was taken during my testing part, and the second picture is my motor drive. I used A4988ET motor drive. The threshold light intensity for opening or closing was also determined during the testing process. After testing, it is the time to make containers of the motor and gear.
I designed my containers using 3D One( Education version), and cut it to slices which are acceptable for 3D printers through Repetier-Host. I because the size of my container must match the size of my motor, an accurate measurement of the size of my motor, gear, and space under the ceiling is crucial. A vernier caliper is preferred. The thickness of my containers is 5mm, and the density is 20%. After I had finished my model, I printed that out using the 3D printer in the XmakerSchool, South West JiaoTong University, China.
5.Implement containers and connect to the curtain
I used electric drill to make setscrews into the ceiling and put gaskets between the containers and the setscrew because I afraid that my containers are not strong enough. Don’t forget to put some newspaper on the floor before beginning to drill, because the powder from the ceiling is extremely difficult to collect. In my design, the conveyor is directed connected to the curtain, and the length between the curtain and the conveyor shorter than the distance of the link between them. As a result, the link will have a angle which enables the stepper to pull the curtain easily.
6.Power supply and final adjustment
I put my Arduino board on the frame of the window using Scotch tape. Because my wire is too short, I had to use patch board. Because the total mass of the patch board and wire is too heavy for Scotch tape, I used a rope to hold the patch board. The light-sensitive resistor was also put on the window with Scotch tape. After examining the heat generation and the stability of the system, my Smart Curtain was finally finished! I can now stop opening and closing the curtain in my room with my hand.Even though, I think that my curtain should also be able to be control by human, but just light intensity. I was now trying to use Bluetooth to control it, and I will publish new Instructables after by Bluetooth part has been finished in the future. If you have any suggestions or advice, please tell me! Also, I think there must be some grammar mistakes in this Instructable because I’m a non-native English speaker. Thanks for your tolerance of my poor grammar and thanks for viewing!
7.Bluetooth control added
I have finally completed my study the use of Bluetooth in Arduino and improved my previous Smart Curtain with Bluetooth technology. First, get a Bluetooth part and implement it on Arduino. Remember that the TX and RX on the board should be connected to the RX and TX of Bluetooth, respectively. Second, I improved my program by adding a condition change. The user can change the condition of the curtain using Crazy Car, an app on cell phones. When in Automatic mode, the curtain respond to the light intensity; while in manual mode, the curtain only respond to signal sent by the cell phone using Bluetooth. I used an LED to indicated the status of the curtain. By the way, I found that there was not enough GND on the Arduino board so I soldered two wires to it. My new Arduino program and app Crazycar were provided here.
 作品上传到全球最大的创客作品分享平台instructable后,很快获得了非常多的人支持和喜欢。